

If you run a WordPress site and you’re not using Cloudflare yet, you’re leaving free performance and security on the table. This Cloudflare WordPress tutorial walks you through everything – what it is, how it works, how to set it up, and the settings I use across 100+ client sites at my agency.
I’ve been using Cloudflare on every WordPress site I manage for years now. It’s one of those rare tools where the free version genuinely does the job. No catches, no “upgrade to unlock the useful bit” nonsense. You set it up once, configure a handful of settings, and your site is faster, more secure, and more reliable. Done.
Let’s get into it.

Table of Contents
What Is Cloudflare? (And What It Isn’t)
Think of your web server as a shop. Right now, anyone can walk straight in – good customers, bad customers, bots pretending to be customers, people trying to break in through the back door. Cloudflare is like hiring a security guard and a fleet of delivery drivers. The security guard checks everyone coming in and stops the dodgy ones. The delivery drivers keep copies of your shop’s most popular items (your images, stylesheets, scripts) in warehouses around the world, so visitors get what they need from the nearest location instead of travelling all the way to your one shop.
That’s it. That’s what Cloudflare does.
What it is NOT:
- It’s not hosting. Your files stay exactly where they are. Your hosting provider doesn’t change.
- It’s not a domain registrar (though it does offer domain registration). You don’t need to buy your domain through Cloudflare.
- It’s not a website builder. It doesn’t touch your WordPress installation.
Technically, Cloudflare is a reverse proxy and content delivery network (CDN). It sits between your visitors and your server. Every request passes through Cloudflare first, and Cloudflare decides what to do with it – serve a cached copy, pass it through to your server, or block it entirely.
The free plan handles about 90% of what any WordPress site needs. I’m not exaggerating. Most of the 100+ sites I manage run on the free plan and they run brilliantly.
How Cloudflare Actually Works
This is where I see the most confusion, so let me break it down properly.
Without Cloudflare
Here’s what happens when someone visits your site without Cloudflare:
- Visitor types your domain into their browser
- Their browser looks up your domain’s DNS to find your server’s IP address
- The request goes directly to your server
- Your server runs WordPress, queries the database, builds the page
- Your server sends the finished page back to the visitor
Every single request hits your server. Every image, every CSS file, every page load – your server does all the work, every time, for every visitor.
With Cloudflare
Now here’s what happens with Cloudflare in place:
- Visitor types your domain into their browser
- Their browser looks up your domain’s DNS – which now points to Cloudflare
- Cloudflare checks: “Have I got a cached copy of what they’re asking for?”
- If yes, Cloudflare serves it directly. Your server doesn’t even know someone visited.
- If no, Cloudflare fetches it from your server, serves it to the visitor, and caches a copy for next time.
Your server does less work. Pages load faster. Everyone’s happy.
But My Hosting Isn’t My Domain Provider…
So, THIS is the bit that confuses everyone. I get asked about this constantly, so let me be really clear.
You’ve got three things that are often with three different companies:
- Your domain registrar – where you bought your domain name (GoDaddy, Namecheap, 123 Reg, whoever)
- Your hosting – where your WordPress files and database actually live (SiteGround, Cloudways, WP Engine, etc.)
- Your DNS – the system that tells browsers where to find your site
When you set up Cloudflare, you change your domain’s nameservers at your registrar to point to Cloudflare’s nameservers. That’s it. That’s the only change.
Cloudflare then manages your DNS. It knows your server’s real IP address because you tell it during setup (or it imports it automatically). When someone visits your site, Cloudflare receives the request first, does its thing, and passes it on to your actual server when needed.
Your hosting doesn’t change. Your files don’t move. Nothing moves.
Think of it like changing your mail forwarding. You tell the post office (Cloudflare) to receive your post first. They check it, filter out the junk, and deliver the good stuff to your house (your server). Your house hasn’t moved. Your address hasn’t changed. You just added a middle step that makes everything better.
Does Cloudflare Actually Copy Your Website?
Sort of, but not like you’re probably thinking.
Cloudflare doesn’t make a complete copy of your WordPress site. It caches static files – the stuff that doesn’t change between visitors:
What Cloudflare caches (by default):
- Images (JPG, PNG, GIF, WebP, SVG)
- CSS stylesheets
- JavaScript files
- Fonts
- PDFs and other static documents
- Media files
What Cloudflare does NOT cache (by default):
- HTML pages (your actual content)
- PHP responses
- Anything behind a login
- wp-admin pages
- Dynamic content (search results, cart pages, etc.)
- API responses
This is important to understand. By default, Cloudflare is only caching the heavy stuff – the images, the stylesheets, the scripts. The actual HTML of your pages still comes from your server every time.
Now here’s where the speed benefit kicks in. Cloudflare has over 300 data centres worldwide. When someone in New York visits your site, they get your images from a Cloudflare server in New York, not from your server sitting in a data centre in Manchester. The HTML still comes from your server, but all the heavy static files come from somewhere physically close to the visitor.
That’s why it’s faster. It’s not magic – it’s proximity. Physics. Data travelling a shorter distance arrives sooner. Simple as that.
Why Every WordPress Site Should Use Cloudflare
I’m not someone who says “every site should use X” lightly. But with Cloudflare, I mean it. Here’s why.
Speed
Your static files get served from the nearest Cloudflare data centre to your visitor. For a site with visitors spread across the UK, Europe, or globally, this makes a noticeable difference.
I’ve seen sites drop 200-500ms off their load times just by adding Cloudflare. That doesn’t sound like much until you realise Google measures Core Web Vitals in milliseconds, and your visitors make snap judgements about your site in the first second.
Cloudflare also enables Brotli compression (better than gzip), HTTP/2 and HTTP/3 for faster connections, and Early Hints which let browsers start loading resources before your server even responds. All free.
Security
This is honestly where Cloudflare stands out:
- Free SSL certificates – automatic HTTPS for your site, renewed automatically, zero config
- DDoS protection – included on every plan, even free. Cloudflare absorbs attack traffic before it reaches your server
- Bot protection – filters out malicious bots hitting your site
- Hidden server IP – your real server IP is masked behind Cloudflare, making it harder to attack directly
- Firewall rules – block specific countries, IPs, user agents, or URL patterns
- Rate limiting – stop brute force attacks
I’ve had client sites hit with DDoS attacks that would have taken them completely offline. With Cloudflare in front, the site stayed up. The attack was absorbed by Cloudflare’s network. The client didn’t even notice.
For a deeper dive, check out our complete WordPress security guide.
Reliability
Cloudflare has a feature called Always Online. If your server goes down, Cloudflare serves a cached version of your site to visitors. It’s not perfect – forms won’t work, dynamic content won’t load – but your visitors see your site instead of an error page.
For a business site, that’s the difference between “their site’s down, I’ll go to a competitor” and “the site loaded fine.” Even a static cached version is better than nothing.
It’s Free
I keep saying this because it’s worth repeating. The free plan includes:
- Global CDN
- SSL certificates
- DDoS protection
- DNS management
- Firewall rules (up to 5)
- Always Online
- Page rules (up to 3)
- Bot Fight Mode
You’d pay good money for any one of those features from another provider. Cloudflare gives you all of them for nothing.
Does Cloudflare Affect SEO?
One question I get asked every time I do a Cloudflare WordPress tutorial is whether it affects SEO. Short answer: yes, positively.
Here’s why:
Page speed is a ranking factor. Google has been using page speed in its ranking algorithm for years. Cloudflare makes your site faster. Faster site = better rankings. It’s not the only factor, obviously, but it helps.
Google prefers HTTPS. Cloudflare gives you free SSL, which means your site runs on HTTPS. Google has confirmed HTTPS is a ranking signal. If you’re still on HTTP in 2026, you’re actively hurting your rankings.
Core Web Vitals improvement. Cloudflare’s CDN, compression, and HTTP/2 support all contribute to better Largest Contentful Paint (LCP) and First Input Delay (FID) scores. These are Core Web Vitals that Google uses for ranking.
Reduced downtime. If your site goes down, Google’s crawlers get errors. Too many crawl errors and Google starts losing trust in your site. Cloudflare’s Always Online feature and DDoS protection mean fewer outages and fewer crawl errors.
There’s no downside here. Cloudflare only helps your SEO.
Cloudflare WordPress Tutorial: Step by Step Setup
Right, let’s actually do this. The whole process takes about 15 minutes, though nameserver propagation can take a bit longer.
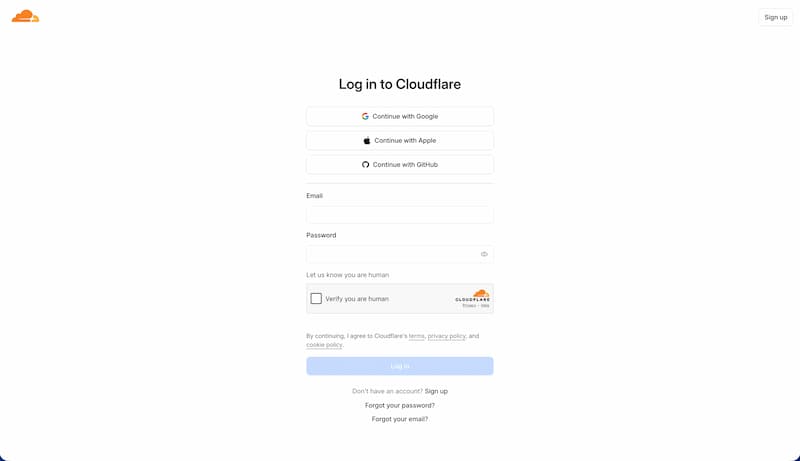
Step 1: Create Your Cloudflare Account
Head to cloudflare.com and sign up. Email and password. Nothing fancy.
Step 2: Add Your Website
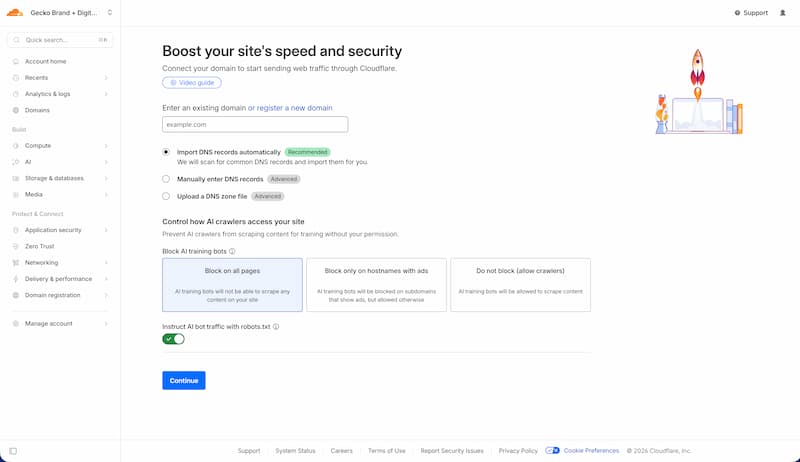
Click “Add a Site” and type in your domain name (just the domain – yourdomain.com, not the full URL with https:// or www).
Cloudflare will scan your existing DNS records. This usually takes about 60 seconds.
Step 3: Review Your DNS Records
This is where you need to pay attention. Cloudflare will show you all the DNS records it found for your domain. You need to check a few things:
The orange cloud vs grey cloud: Each record has a proxy toggle. Orange cloud means traffic goes through Cloudflare (proxied). Grey cloud means it goes directly to your server (DNS only).
- Your main A record (@ or yourdomain.com) should be orange cloud (proxied)
- Your www A record or CNAME should be orange cloud (proxied)
- Your MX records (email) should ALWAYS be grey cloud. If you proxy MX records through Cloudflare, your email will break. This catches people out constantly.
- FTP records, if you have them, should be grey cloud
Check your MX records exist. If Cloudflare didn’t import your MX records, add them manually. Without MX records, you won’t receive email. Check with your email provider for the correct values.
Double check your subdomains. Cloudflare does a great job of finding your current DNS records and importing them, but it doesn’t always catch everything. The biggest culprit for missing records is subdomains. If you have something set up on app.yourdomain.com or mail.yourdomain.com, Cloudflare quite often misses these. Go back to your current DNS provider, compare every record, and make sure you add any that are missing before you switch your nameservers. Finding out a subdomain stopped working two weeks later is not a fun conversation to have.
Step 4: Choose the Free Plan
Cloudflare will show you the plan options. Pick Free. You can always upgrade later, but you probably won’t need to.
Step 5: Update Your Nameservers
Cloudflare will give you two nameservers. Something like:
- ada.ns.cloudflare.com
- bob.ns.cloudflare.com
You need to go to your domain registrar (wherever you bought your domain) and change the nameservers to these two. Every registrar has this option somewhere in their domain management panel. Usually under “Nameservers” or “DNS Settings.”
This is the bit that worries people. “If I change my nameservers, will my site go down?” No. Cloudflare already has your DNS records from Step 3. The moment nameservers switch over, Cloudflare starts handling requests and pointing them to your existing server. Seamless.
Nameserver changes can propagate in minutes but sometimes take up to 24 hours. In my experience, it’s usually done within an hour. Cloudflare will email you when it’s active.
You can check if your nameservers have updated by visiting whatsmydns.net – type in your domain, and you’ll see whether servers around the world have picked up the new Cloudflare IP addresses yet.
Step 6: Configure SSL/TLS
This is the most critical step. Get this wrong and your site will break.
Go to SSL/TLS in your Cloudflare dashboard and set the encryption mode to Full or Full (Strict).
- Full – encrypts traffic between visitor and Cloudflare AND between Cloudflare and your server. Your server needs an SSL certificate (most hosts provide one).
- Full (Strict) – same as Full but validates your server’s certificate. Use this if your host provides a proper SSL certificate (most modern hosts do).
- Flexible – NEVER use this with WordPress. It only encrypts between the visitor and Cloudflare. Traffic between Cloudflare and your server is unencrypted. This causes infinite redirect loops with WordPress because WordPress sees HTTP, tries to redirect to HTTPS, Cloudflare sees HTTPS, sends HTTP to WordPress… loop forever.
I’ve lost count of how many “my site’s in a redirect loop” support requests I’ve dealt with where the answer was “change Flexible to Full.” Don’t make this mistake.
Step 7: Test Everything
Once nameservers have propagated and SSL is configured:
- Visit your site. Does it load? Good.
- Check the padlock. Is it showing HTTPS with a valid certificate? Good.
- Check wp-admin. Can you log in? Can you edit a page? Good.
- Run a speed test. Use GTmetrix or Google PageSpeed Insights. Take a screenshot of your scores BEFORE Cloudflare (if you have one) and compare.
- Check headers. Open browser dev tools (F12), go to Network tab, reload, click on any image or CSS file, and look for a
cf-cache-statusheader. If you seeHIT, Cloudflare is caching that file.MISSmeans it fetched from your server (first request).DYNAMICmeans Cloudflare isn’t caching it (normal for HTML).
That’s the core of this Cloudflare WordPress tutorial – but there’s more you can do.
Essential Settings to Configure
The defaults are decent, but these tweaks make a real difference.
SSL/TLS Settings
- Always Use HTTPS: ON – redirects all HTTP requests to HTTPS automatically
- Automatic HTTPS Rewrites: ON – fixes mixed content issues by rewriting HTTP URLs to HTTPS in your pages
- Minimum TLS Version: 1.2 – older versions have known vulnerabilities. No reason to support them.
Speed Settings
- Auto Minify: Turn on for CSS, JavaScript, and HTML. Strips whitespace and comments from your code, making files smaller.
- Brotli: ON – better compression than gzip. No reason to leave this off.
- Early Hints: ON – tells the browser what resources to start loading before the server finishes processing. Free speed boost.
- Rocket Loader: TEST IT. This one’s controversial. It delays loading of all JavaScript until after the page renders. In theory, great for performance. In practice, it breaks things. I’ve seen it break sliders, forms, WooCommerce, and various plugins. Turn it on, test your site thoroughly, and turn it off if anything’s broken. On maybe 1 in 5 sites I manage, it works fine. The other 4, it causes issues.
Caching Settings
- Caching Level: Standard – this is the default and works well
- Browser Cache TTL: Respect Existing Headers – let your WordPress caching plugin or server handle browser cache headers. Cloudflare doesn’t need to override them.
- Always Online: ON – shows cached version of your site if your server goes down
Security Settings
- Security Level: Medium – balanced between blocking threats and not annoying legitimate visitors. If you’re getting lots of attacks, bump it up.
- Browser Integrity Check: ON – blocks visitors with suspicious HTTP headers (common with bots)
Network Settings
- HTTP/2: ON – faster protocol for loading multiple files simultaneously
- HTTP/3 (QUIC): ON – even faster, uses UDP instead of TCP. Modern browsers support this.
- 0-RTT Connection Resumption: ON – returning visitors connect faster. Tiny security trade-off (replay attacks) but generally worth it for the speed improvement.
Quick Wins Most People Miss
These are the settings and features I configure on every client site that most tutorials skip over.
Block xmlrpc.php
This is one of the first things I do on every site. The xmlrpc.php file is a legacy WordPress feature that most sites don’t need. But attackers love it – it’s used for brute force attacks and DDoS amplification.
In Cloudflare, go to Security > Security Rules > Create Rule:
- Field: URI Path
- Operator: contains
- Value: xmlrpc.php
- Action: Block
Done. One rule, massive security improvement. If you use the WordPress mobile app or Jetpack (which uses XML-RPC), you might need this, but most sites don’t.
For more ways to lock down your site, read our guide on securing your WordPress installation.
Bot Fight Mode
Under Security > Settings, toggle Bot Fight Mode on. This uses Cloudflare’s machine learning to identify and challenge malicious bots.
One big warning though: Bot Fight Mode can break WooCommerce webhooks. If you use Stripe, PayPal, or any payment gateway that sends webhooks to your site, Bot Fight Mode might block them. I’ve had payment confirmations silently fail because of this. If you run an ecommerce site, either skip this or create a WAF rule to bypass bot checks for your webhook URLs.
For non-ecommerce sites, turn it on. It’s brilliant.
Custom Firewall Rules
You get 5 free firewall rules. Use them wisely:
- Block countries you don’t serve. If you’re a UK plumber, you don’t need traffic from countries you’ve never served. Block them. Kills a huge amount of bot traffic.
- Block known bad user agents. Certain user agent strings are almost always malicious. Block them.
- Challenge suspicious traffic. Instead of outright blocking, you can present a CAPTCHA challenge to traffic from high-risk countries or IP ranges.
Redirect Rules
Want to redirect www to non-www (or vice versa)? Do it at the Cloudflare level instead of in WordPress or .htaccess.
Go to Rules > Redirect Rules and set it up there. It’s faster because the redirect happens at Cloudflare’s edge before the request even reaches your server. Your server doesn’t have to process it at all.
Email Routing
This one surprises people. Cloudflare offers free email forwarding. You can set up [email protected] and have it forward to your Gmail or Outlook inbox.
Go to Email > Email Routing. Add a destination address (your Gmail, for example), verify it, then create routing rules. It’s not a full email hosting solution – you can’t send FROM your domain address without additional setup – but for receiving email at a professional address, it’s free and works perfectly.
Under Attack Mode
If you ever find yourself under a DDoS attack (sudden massive traffic spike, site going down), Cloudflare has a nuclear option. Go to your dashboard and turn on “Under Attack Mode.”
This presents a JavaScript challenge page to every single visitor for about 5 seconds before letting them through. It’s aggressive and your legitimate visitors will notice, but it filters out the vast majority of attack traffic. Use it when you need it, turn it off when the attack stops.
Common Mistakes and How to Fix Them
After years of managing Cloudflare across dozens of sites, these are the issues I see over and over:
Infinite redirect loop: Your site just keeps redirecting and never loads. This is almost always because SSL is set to “Flexible.” Change it to “Full” or “Full (Strict)” in SSL/TLS settings. Fix takes 30 seconds, propagates in minutes.
Old content showing after updates: You updated a page but the old version keeps showing. Go to Caching > Purge Everything. Or better yet, install the Cloudflare WordPress plugin which purges automatically on content changes. You can also purge individual URLs.
Can’t access wp-admin: You can load the site but can’t log in, or you keep getting Cloudflare challenge pages. Your IP is being flagged by a security rule. Go to Security > WAF and add your IP address to the allowlist. If you’ve got a static IP, do this straight away.
Rocket Loader breaking your site: Forms not submitting, sliders not sliding, JavaScript not running. Go to Speed > Optimisation and turn off Rocket Loader. This is the single most common Cloudflare-related issue I deal with.
WooCommerce payments failing: Orders go through but payment confirmations don’t arrive, or webhook errors in your payment gateway dashboard. Usually caused by Bot Fight Mode or a WAF rule blocking your payment provider’s servers. Create a WAF rule that skips security checks for your webhook URL (usually something like /wc-api/ or /wp-json/wc/).
Site seems slower after Cloudflare: Check if Development Mode is on (it disables caching). Check if Rocket Loader is causing issues. Also, the very first request after setup or cache purge will be slower (MISS) because Cloudflare hasn’t cached anything yet. Give it a day of normal traffic, then test again.
Is the Free Plan Enough?
For most WordPress sites, absolutely yes. I manage 84+ client sites and the majority are on the free plan. They perform brilliantly.
But here’s what the paid plans add, if you’re curious:
- Pro ($20/month): Image optimisation (Polish – converts to WebP, compresses automatically), Mirage (lazy loading and responsive images), enhanced HTTP/2 prioritisation. Nice to have, not essential.
- Business ($200/month): WAF managed rulesets (OWASP rules, etc.), custom SSL certificates. Mostly for sites with specific compliance requirements.
The one paid feature I’d actually recommend considering is Cloudflare APO (Automatic Platform Optimisation) at $5/month. It’s specifically designed for WordPress and does something the free plan doesn’t – it caches your HTML pages too, not just static files. This means even your page content gets served from Cloudflare’s edge. It’s a significant speed boost for sites with global audiences.
But honestly? The free plan plus a good WordPress caching plugin like WP Rocket or LiteSpeed Cache covers 95% of sites. APO is a nice bonus if you want that extra edge.
The Cloudflare WordPress Plugin
Cloudflare has an official WordPress plugin. Install it from the WordPress plugin directory – just search “Cloudflare.”
What it does:
- Connects to your Cloudflare account via API token
- One-click “Optimise for WordPress” button that applies recommended settings
- Automatic cache purging when you update a post, page, or change your theme. This is genuinely useful – without it, you’d need to manually purge cache or wait for it to expire.
- Shows basic analytics in your WordPress dashboard
Is it essential? No. Everything it does you can do manually through the Cloudflare dashboard. But the automatic cache purging is convenient enough that I install it on most client sites. It removes one more thing to think about.
Set it up by going to Settings > Cloudflare in your WordPress admin, entering your Cloudflare email and API key, and clicking “Apply Default Settings.” Takes about 2 minutes.
Wrapping Up
If you’ve read through this Cloudflare WordPress tutorial, you know more about Cloudflare than 90% of WordPress site owners. Here’s the summary:
- Cloudflare is free and every WordPress site should be using it
- Setup takes about 15 minutes
- You get speed improvements, security features, and reliability that would cost you money anywhere else
- The free plan is genuinely enough for most sites
- The biggest mistake people make is setting SSL to Flexible – use Full or Full (Strict)
- A few quick wins like blocking xmlrpc.php and enabling Bot Fight Mode make a massive difference
This guide came from a live WP Odyssey session where we walked through the entire setup together. If you want to see more of these deep dives, come join us.
Start with the free plan. You’ll probably never need to upgrade. And your WordPress site will be faster, more secure, and more reliable for it.